This is a continuation of the things you can make with the stitch used in the cat eye bracelet to mix things up I show you how you can make your own ending clasp. It is really light weight and easy to wear all day. So let have fun with it guys!
Here is what you will need
Fine wire (tarnish resistant) – 26, 28, 30 (the larger the gauge, the smaller the wire is, which makes it easier to work with your crochet hook) I used a amethyst 28 gauge.
Crochet hook – I used a 3/2 .10 mm hook.
2 end clasps – which ever design you like (if your not doing the ending I did).
Beads – As many as you would like in each cluster ( I used 23 seed beads)
Determine how long your bracelet will be. I have a tiny wrist and made this so that it would fit snug against it, so unless you have a child size wrist I would add at least 1 extra bead section for smaller wrist and 2 for bigger wrists.
You can always add extra beads to your wire and if you notice it is to small then crochet more on it (in groups of 6)
Scissors – to cut the wire of course (it’s very fine so normal scissors will work).
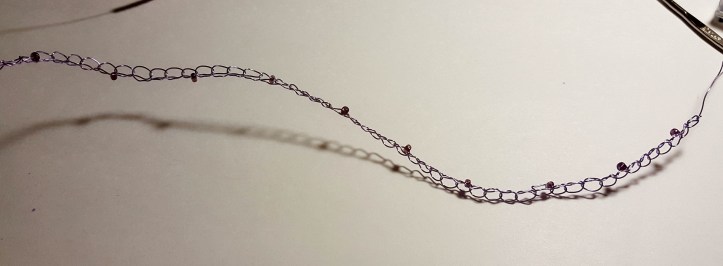
Step 1
place your beads on the wire. Slip knot, chain 4 (this is for the ending) chain in groups of 6 until you reach your determined length ( place your beads in either the same place for each group or alternate them, DO NOT add beads to the 6th one in the group)
On the last one chain 8 then slip stitch it 9 stitches away from the hook. (this is for the ending)
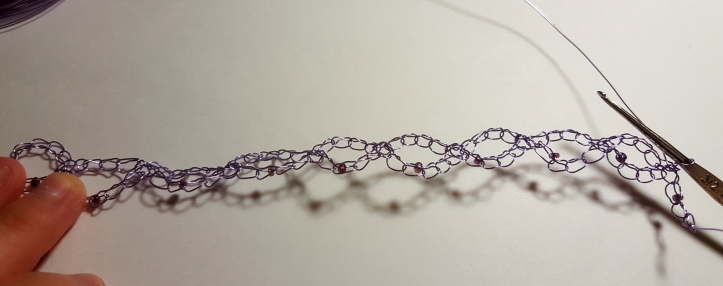
Step 2
Turn your work. Chain 5 then slip stitch into the 6th spot chain from above. repeat this until you are out of groups of 6.
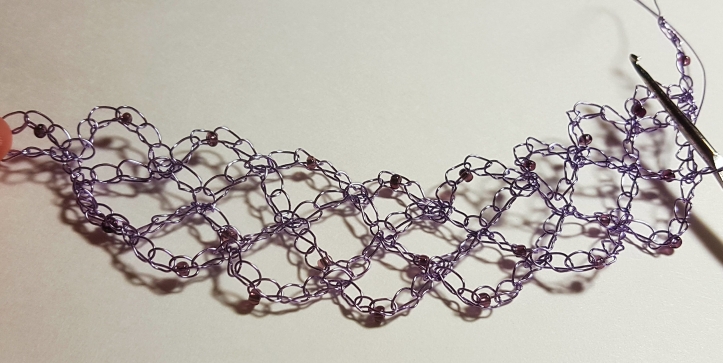
Step 3
turn you work, slip stitch until you reach the middle of the current diamond. Chain 5 and slip stitch it with the 3rd spot from the chain above (repeat this for all the groups you have) Add beads however you wish not on the 3rd chain since that is where the next slip stitch will be going.
Step 4
Turn your work, slip stitch until you reach the middle of the current diamond. Chain 5 and slip stitch it with the 3rd spot from the chain above (repeat this for all the groups you have) Add beads however you wish. Fasten off and weave into the work make sure not edge is showing your able to poke you
Step 5
Making our own end clasp, is pretty simple add a bead to the starting tail, one that is almost the same size as the circle we made earlier. Make sure to fully secure the bead a couple of times so it does not fall off.
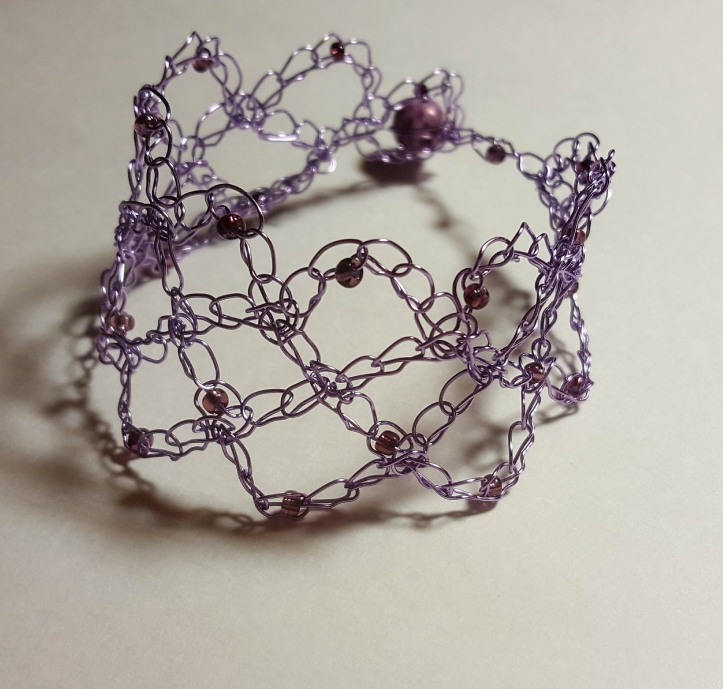
You should now have a Wave Cuff, go you! What do you think, tell me in the comments below.
If you have any questions or concerns please leave a comment below and I will answer them as best as I can.
show your appreciation by liking or sharing this page!
